Identifying pests and managing infestations
On this page
Introduction
Despite entomology curators having a great fondness for insects, there are some that we do not want to see in collections... those that are considered pests!
There are several species of insect (primarily moths and beetles) that will feed on dead, dry insects, causing irreversible damage. If these insects gain access to specimens and go undetected, they can destroy entire collections.
Key pest species
Below are examples of pests that pose a risk to insect collections in the UK.
Bear in mind that these images show pests in their adult stages. For most species, it is the immature stages that cause the feeding damage, but these can often be harder to spot.
Moths
The following species of moths can cause damage to entomology collections:
- Case bearing clothes moth (Tinea pellionella)
- Webbing clothes moth (Tineola bisselliella)
- Brown house moth (Hofmannophila pseudospretella)
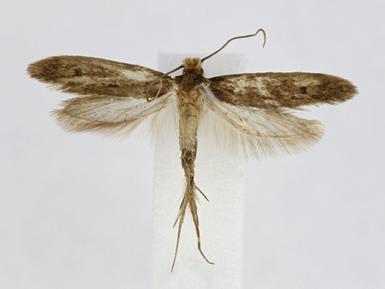
Tinea pellionella (Case bearing clothes moth).
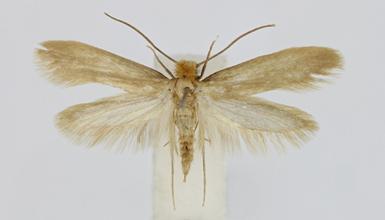
Tineola bisselliella (Webbing clothes moth).
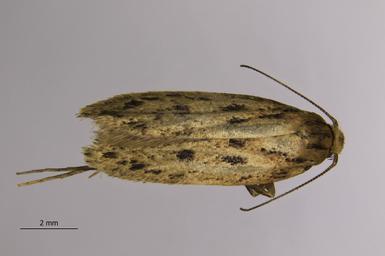
Hofmannophila pseudospretella (Brown House-moth).
Beetles
Some beetles can also cause irreversible damage to entomology collections if not properly monitored or controlled.
Examples include:
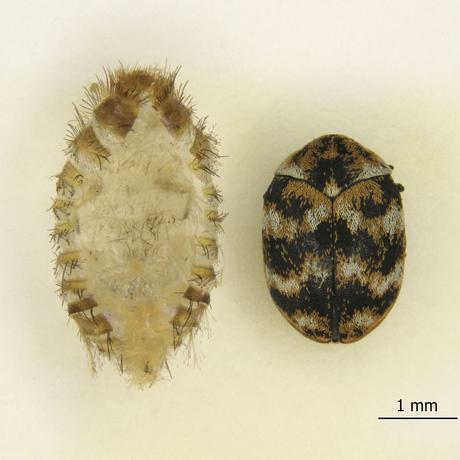
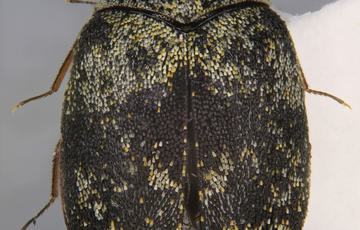
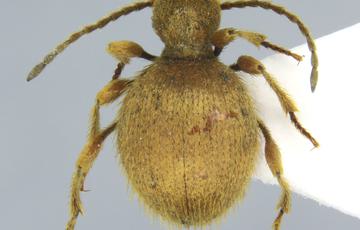
- Varied carpet beetle (Anthrenus verbasci)
- Guernsey carpet beetle (Anthrenus sarnicus)
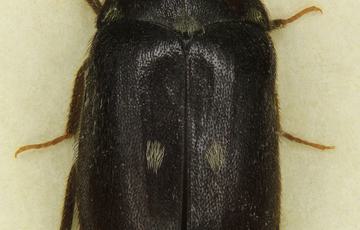
- Two-spot carpet beetle (Attagenus pellio)
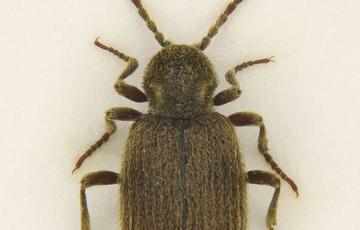
- Australian spider beetle (Ptinus tectus)
- Golden spider beetle (Niptus hololeucus)
Image gallery
Signs of infestations
The key signs of pest infestations to look out for are:
- frass (insect poo)
- cast skins
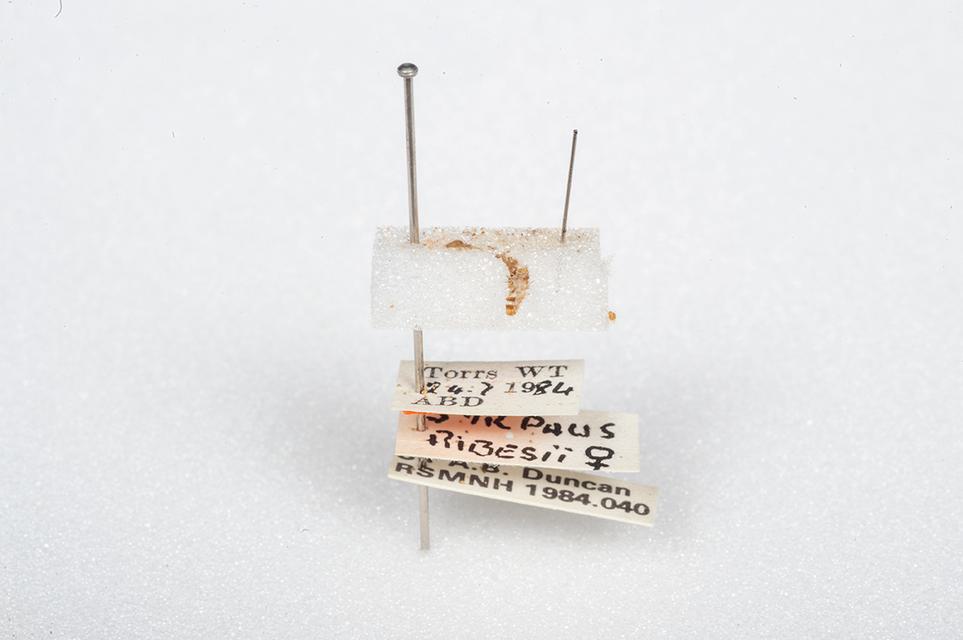
- specimens with broken or missing appendages
- missing specimens (a blank card mount or empty pin)
Frass
Frass is the term given for insect poo. It may look like a fine ‘dust’ below the specimen, but can in fact be an indicator that pests are present in your storage.
Frass may look like a fine ‘dust’ below the specimen.
Cast skins
Exuviae (cast skins) are the remains left behind when an insect moults.
Tip: Look in the corners of the drawer or box and on the specimen itself for cast skins.
The cast skin of a Carpet beetle and an empty pin.
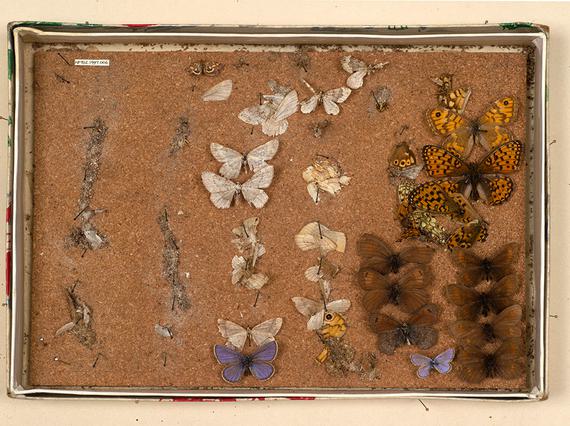
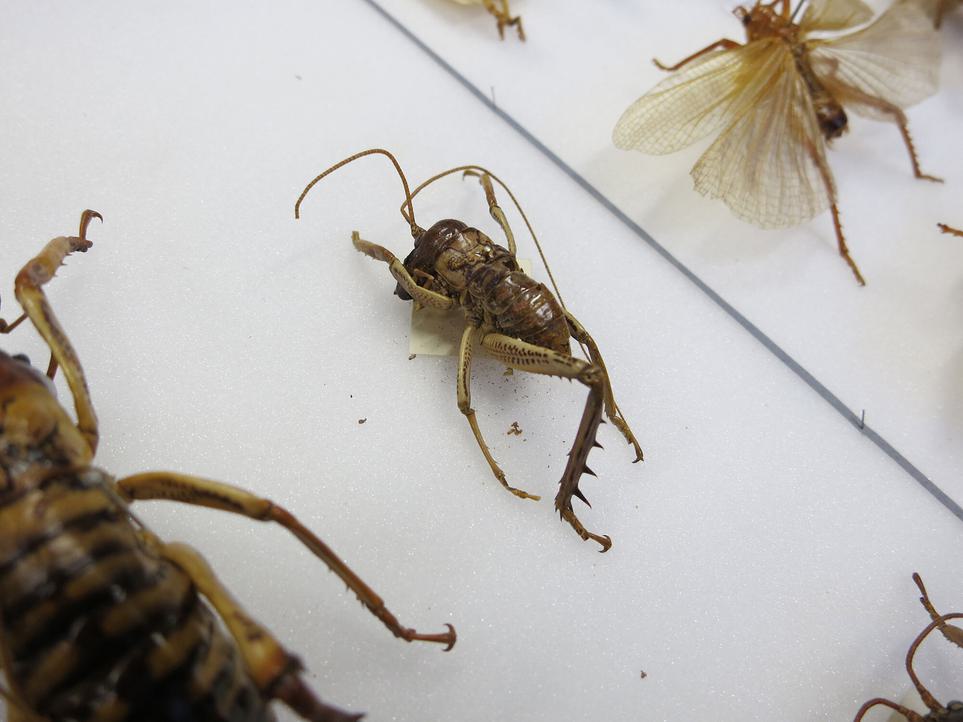
Damaged or missing specimens
Specimens with broken or missing appendages and missing specimens (for example a blank card mount or empty pin) can be signs of pest infestations.
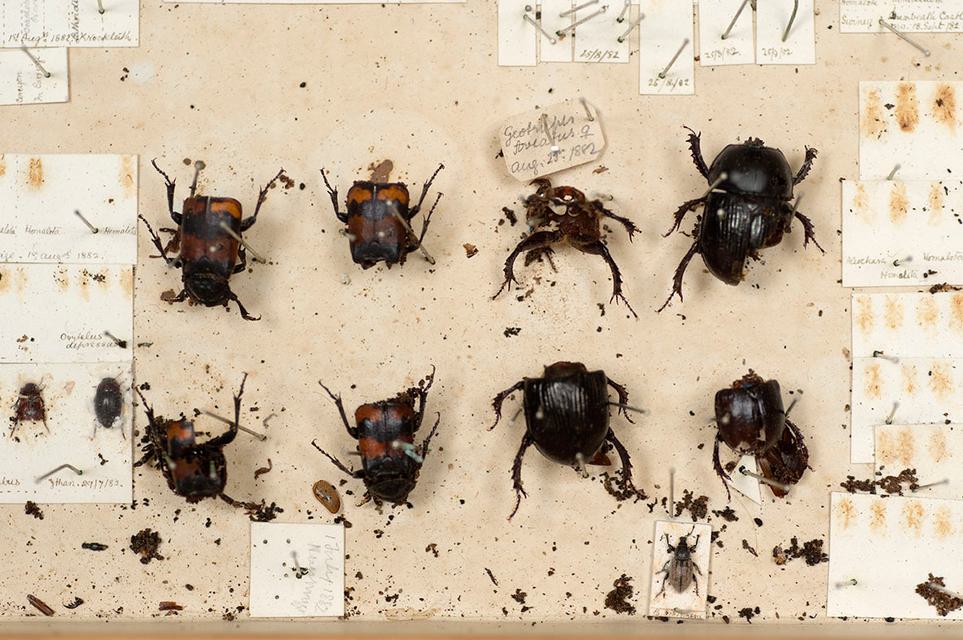
Damaged or missing specimens, and loose appendages in the base of the drawer or box.
Environmental indicators
Some live insects and other invertebrates found in museums are not true pests. However, their presence can indicate that the environmental conditions (such as temperature and humidity) are unsuitable for collections.
Examples include:
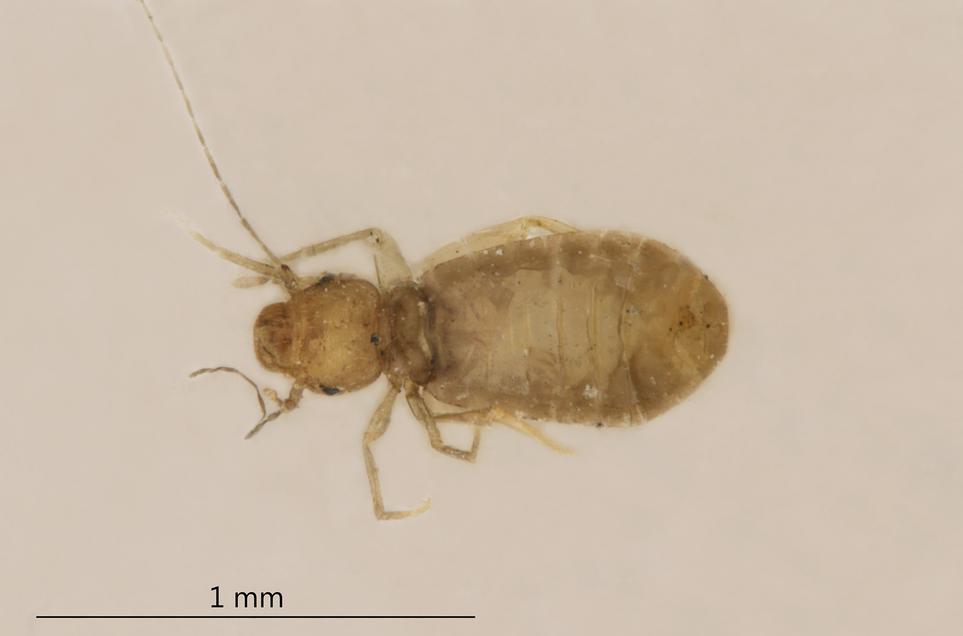
- Booklice
- Silverfish
- Woodlice (also known as Slaters)
Find further information on environmental control in the Preservation and storage of insects.
Other insects may simply be seeking shelter during the winter period (such as Cluster flies and some species of Ladybird), or accidentally wander in during the warmer months (such as Ground beetles).
Preventative measures
To prevent infestation and stop pests entering your collection in the first place you must:
- use good quality storage
- control environmental conditions (temperature and humidity)
- always quarantine new material coming in or returning from loan
- keep the collections area clean and tidy
- do not consume or store food items in collections areas
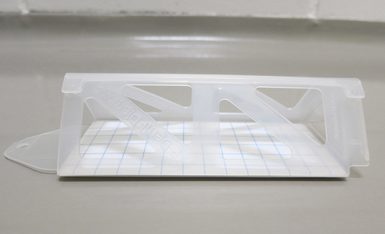
- monitor the area using blunder traps or pheromone traps
- be vigilant!
Learn more about how to prevent infestation in our Integrated Pest Management training.
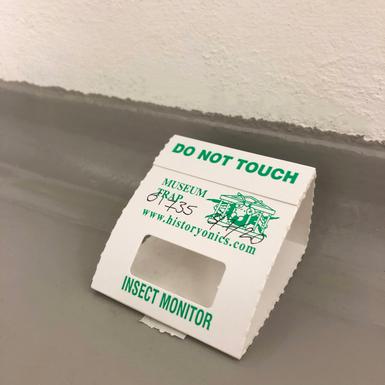
Blunder traps are sticky traps placed at the edges of rooms.
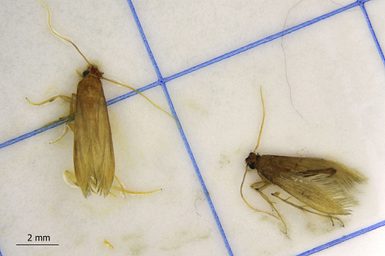
Clothes moths caught via Pheromone trap.
Pheromone traps are similar to sticky traps but with the addition of a synthetic pheromone that targets a specific species.
Quarantine and freezing
Specimens with infestations are a risk to the wider collection. Additionally, any new material entering the collections area poses a risk to the existing collection. Suspected infestations and new material should therefore always be quarantined and, ideally, have low-temperature treatment applied.
Watch the video to learn how to prepare your objects and specimens for quarantine and freezing.
Quarantine basic steps
These are the basic steps for quarantine and freezing covered in the video:
- Place the incoming or infested drawer or box within a good quality polythene bag.
- Attach a label (inside the bag) noting the date the specimens were quarantined.
- Seal the bag.
- Place the specimens in a freezer for a minimum of 3 days at -30C.
- Following the freezing period, remove the drawer or box and allow it to slowly acclimatise to room temperature before removing from the bag. This is to prevent condensation forming on the specimens.
It’s also helpful to:
- Remove any frass from the bottom of the infested drawer or box. This will help ensure historic frass is not confused with signs of a new infestation. A quick way of removing frass from plastazote is to dab the surface with sticky tape.
- Add a label to the specimen pin to indicate if quarantine and freezing has taken place, including the date it was carried out. This provides a record and notifies other collection users that the damage is historical.
Learn more about how to deal with infestation in our Integrated Pest Management training.
Additional resources
- National Museums Scotland- Integrated Pest Management training
- The Institute of Conservation- English Heritage Integrated Pest management resources
- Identifying Booklice in Scottish Galleries, Libraries, Archives and Museums
- Notton, DG. 2018. Identifying insect pests in museums and heritage buildings
More in this resource
Why do museums collect insects?
Learn why we collect insects, and what they’re used for.
Preservation and storage methods
As insects are so diverse in their form, there are many ways they can be preserved.
Specimen preparation and conservation
Discover how to prepare and conserve specimens.
Collections data
Find out how data around entomology collections is used.