Object labelling
Labelling a textile object
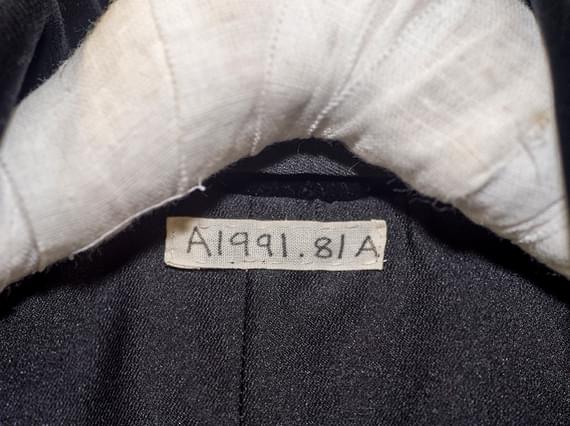
How to apply a label to a textile object
Textiles can be the most difficult objects to label if you find you are uncomfortable with the use of a sewing needle; but much like the Paraloid application, practice makes perfect and can result in beautifully attached labels once you get comfortable with a running stitch application.
Key learning points:
- Ensure that the cotton tape is pre-washed with very hot water and dried completely
- Ironing the cotton tape after applying the number to it helps set the ink
- Ensure correct placement of label on textile and consider the options for display
- Tucking in any raw edges prior to sewing can approve the aesthetic look of the label
- Always use a running stitch around the edge of the tape going with the weave of the fabric.
- Ensure that any larger stitches are at the back of the fabric, shorter at the front
- Match the cotton thread to the textile if possible
- Do not tie the ends of the thread off so that should the label snag, it will not tear the fabric
Pros of labelling a textile
- This is a safe method for labelling textiles as there are no chemicals involved
- This method provides a secure form of identification as it won’t come off. Also, as the running stitch isn’t tied off, it can't rip the textile if the label were to snag on something.
Cons of labelling a textile
- This method creates very small holes in the fabric; this is fine for most fabrics but more delicate materials, such as silks, may need an alternate labelling method
Method Statement
Object labelling by material


Further training resources

Object handling
This training sets out our guidelines and best practice for handling musuem collections.
Object packing
After good handling practices, the next most important skill to apply to consulting and moving collections is good packing.
Integrated pest management
This training sets out our guidelines and best practice for integrated pest management.